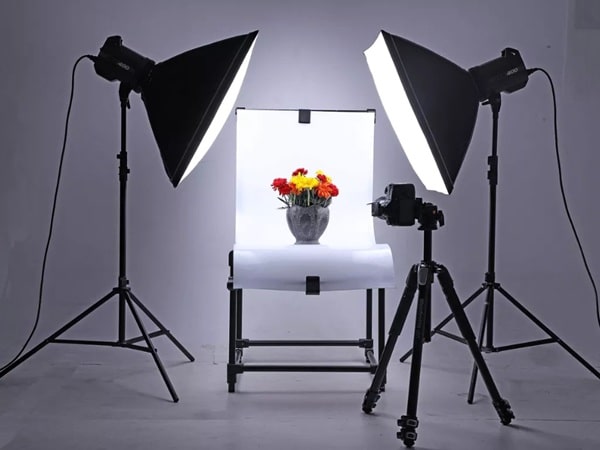
Even your best products will go unnoticed online due to poor product photography. High-quality product images can be the make-it-or-break-it point between a sale and a scroll-past. Your customers depend heavily on images of your products. Online sellers who want to maximise their sales through Flipkart Seller Hub, with access to 50+ crore customers, a 14 lakh+ seller community and deliveries across 19,000+ pin codes, should prioritise mastering product photography because it directly impacts customer buying decisions.
The tips below will help you create eye-catching product images that drive sales; no fancy studio is required for many product categories.

Why High-Quality Product Photography is Non-Negotiable
Buyers today can make product evaluations within seconds, based on poor lighting and unclear or cluttered images that reduce customer trust. High-quality product images function exactly the opposite. It helps you:
- Highlight features clearly
- Boost clicks and conversions
- Build brand trust
- Reduce product returns
This, in turn, boosts confidence and drives sales.
Essential Product Photography Techniques
- Use a Clean, Minimal Background- To keep product focus, always shoot against a neutral or white background. Create a simple DIY setup using a white bedsheet, poster board or wall surfaces. DIY backgrounds work well for many product types. But some categories like jewellery or cosmetics may benefit from more specialised setups.
- Master the Lighting Setup- Lighting is key to professional-looking product photography. For most products, natural daylight is ideal. Avoid direct sunlight to prevent harsh shadows. Use ring lights and LED softboxes, which are available online. For consistency, opt for lighting with a colour temperature around 5000–5500K, which mimics daylight.
- Choose the Right Camera- Users can achieve full control through DSLRs and mirrorless cameras, but smartphones with good cameras deliver fantastic results. A tripod provides stability while shooting in high-resolution mode. Enabling grid lines will help you maintain proper alignment and centre your product.
- Capture Multiple Angles- Showcase your product from the front, back and in use. Add close-ups of textures, details or patterns to build buyer confidence, especially for products like clothing, accessories or electronics.
- Keep it Steady and Sharp- Use a tripod or place your phone on a stable surface to avoid blurry images. Tap to focus or use manual focus settings (based on your device) to ensure clarity, especially around key product features.
Editing Tools to Elevate Your Photos
After the shoot is completed, edit your images to elevate. Below are some beginner-friendly tools:
- Snapseed – This free app helps adjust brightness, contrast and perspective.
- Canva – It can remove the background (available in the Pro version) and add text or icons.
- Adobe Lightroom Mobile – Offers more control over lighting, tones and colours.
Keep the process short and true to life. The objective is to improve, not mislead, your audience. Many marketplaces also discourage excessive editing that alters product appearance.
Flipkart: Your Growth Partner
Flipkart Seller Hub offers tools, insights and supports the sellers to help them build effective listings. Performance analytics and photo guidelines enable you to track results, which you can enhance through excellent product photography for better online visibility.
Conclusion
Hence, your product images need to look stunning and eye-catching. With smart lighting setups, suitable cameras, DIY techniques and straightforward editing software, anyone can master product photography.
If you’re a seller looking to expand your business on Flipkart, focus on product visuals because it will lead to immediate business growth. Your photo is your first impression, so make it count.